TRS+ allows us 20 elements that we can name as we wish. As mentioned in our overview article, you may have different templates for different segments of employees if you need greater flexibility.
Anyway, let's dive in...!
To start download a template from the TRS+ admin area, under "Import".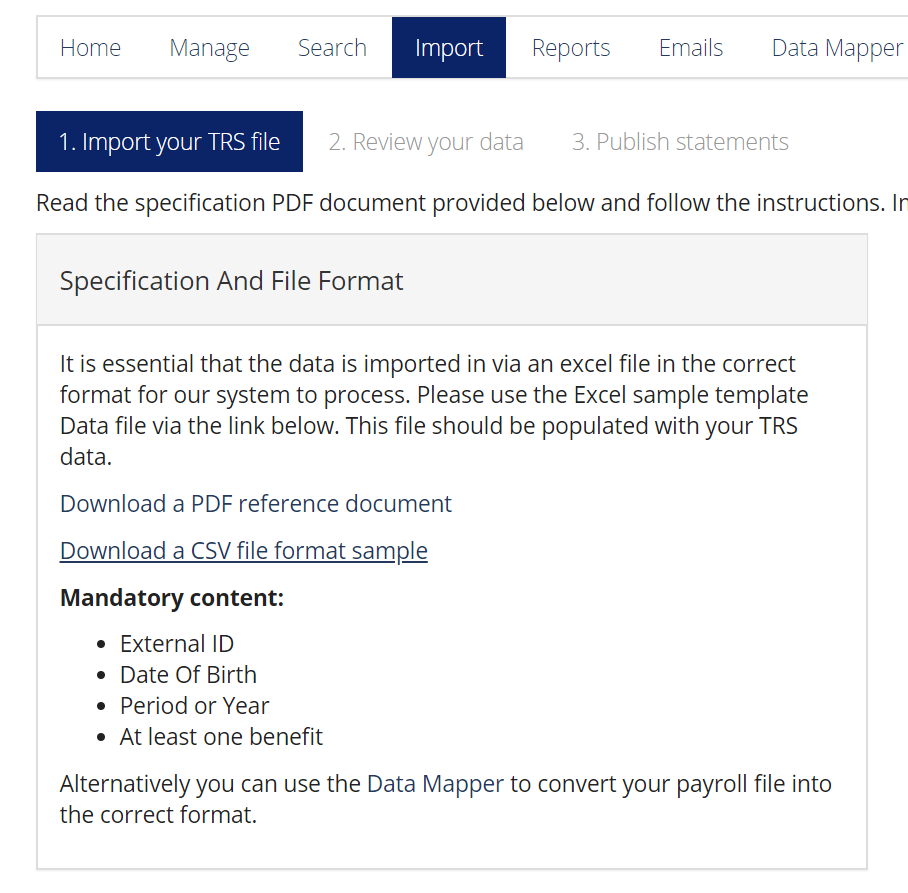
A tale of two halves
The template file can be broken into two different parts, first the mandatory data part, and second the 20 customisable elements you can assign to employees. We'll start with the mandatory data:
Mandatory Data
Columns A through to H are the manadatory fields, that each TRS template should contain.
- ExternalID: this is the unique identifier you have provided us for each employee
- Date of birth: you may be wondering why we require this for a TRS; we'll it's used alongside externalID as a secondary security field - these two fields on each row must match an existing employee when you do your upload, otherwise the TRS will not assign to any user. This is to prevent accidents, such as an incorrect sorting on a file and users seeing the salaries and benefits of other people
- Statement Periods: you may use either columns F&G or just column H, but you must have a defined the statement period in either. This is used to allow staff to look back at their TRS over time; you can upload retrospective values if you wish, doing the last X months or years with multiple rows per person on one upload
Customisable Elements
The latter half of the TRS template is the fun part; the customisable fields. There are 20 in total, but note the file is appended by a total column

These column headers can be customised to whatever you require. The example below shows that "Salary", column I, has been amended to Compensation, and Columns L through to O have been renamed to the names of benefits (I really wish Sweet Money was a real employee benefit...)
Values are added into the relevant cells for each employee for the benefits they have, and the uploaded results look like this:
Note: in our example above the cell M2 is empty, which means this particular employee doesn't see the Death In Service benefit on their view.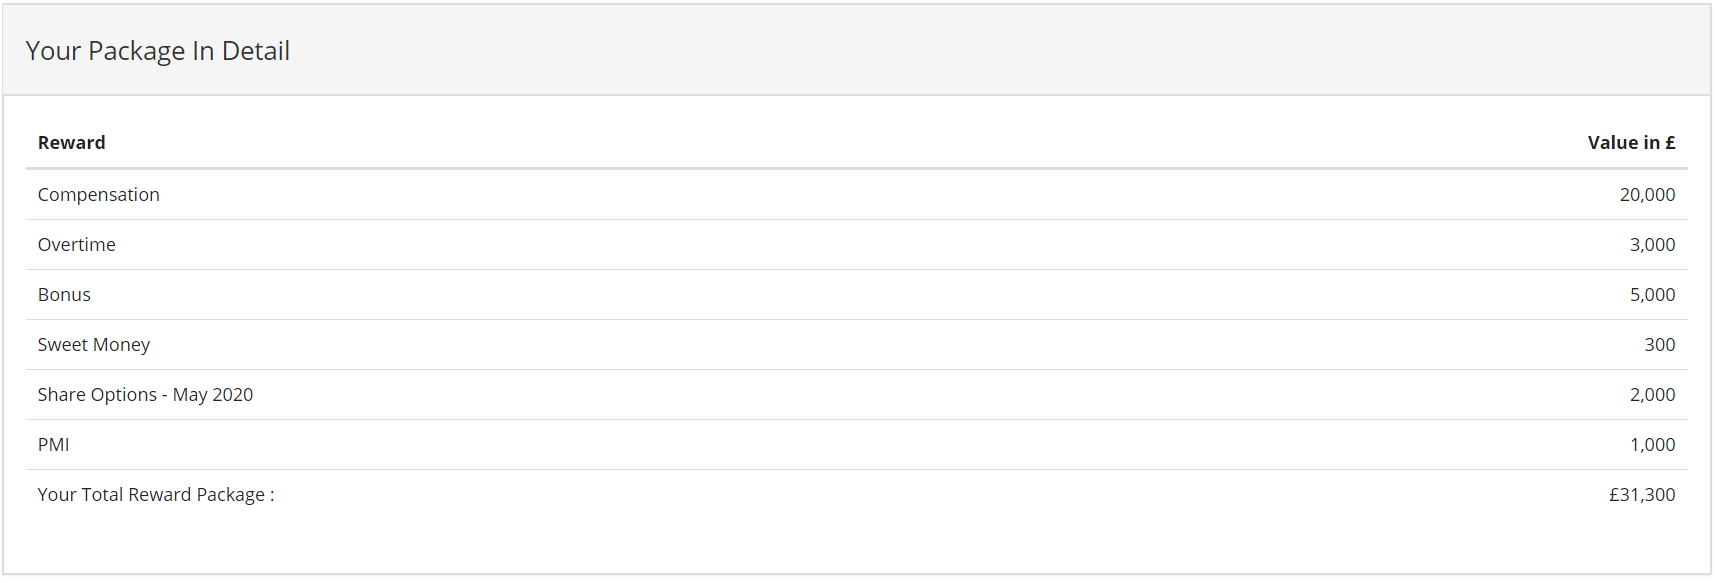
Level Names:
If you want to show the employees the level of cover you are providing for certain benefits, you may amend the customisable elements to include level names, like the example below shows, then populate the relevant cells for each employee.
Note: character limit for an element name is 30

Remember, you have 20 customisable elements but could have as many different template files as you require for different segments of your workforce. We suggest to do this if you use up all of the elements quickly with many different levels of company funding for different employees.
Total Package:
It is very important to remember that the TRS isn't a calculator, it is simply showing the values you put into the spreadsheet on the website. Therefore, if your values are incorrect, and that includes the total package in final column, column AC, then they'll show incorrectly to employees.
One easy trick is use a formula to sum the total of columns I to AB, =SUM(I2:AB2), in each of the total cells so that it updates just prior to import.
The template is uploaded in CSV format, so will lose any formulas when you come back, unless you save a local version of your template in .xlsx format too.
Give it a Try:
Now it's time to give it a try yourself, you can create a TRS for yourself or a demo user, and override as often as you need until you have the right template. Good Luck!
Comments
0 comments
Please sign in to leave a comment.