An Information-Only benefit is a benefit that employees do not need to select and be submitted on the Youatwork portal for approval. For example, a benefit and a link to an external site may be provided for employees to sign-up outside of the portal or perhaps information on a contractual benefit provided by the company that does not require the employee to sign up.
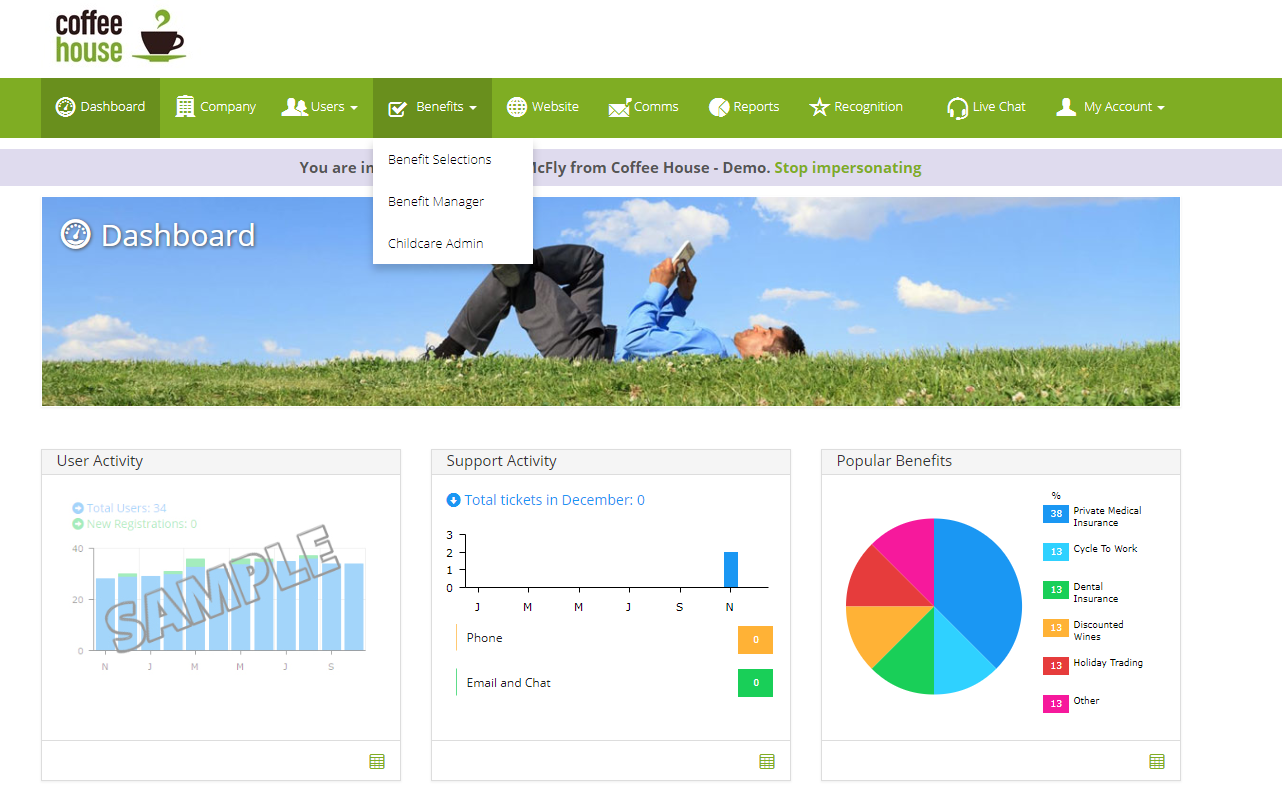
In order to create a new info-only benefit on the portal, you will need to navigate to the benefits manager, only accessible to admins with the Benefit Manager role. From the admin suite, go to Benefits > Benefit Manager. On this page, you will see a drop-down button to ‘Create Benefit’ then select New Benefit to get to the Benefit creator tool.
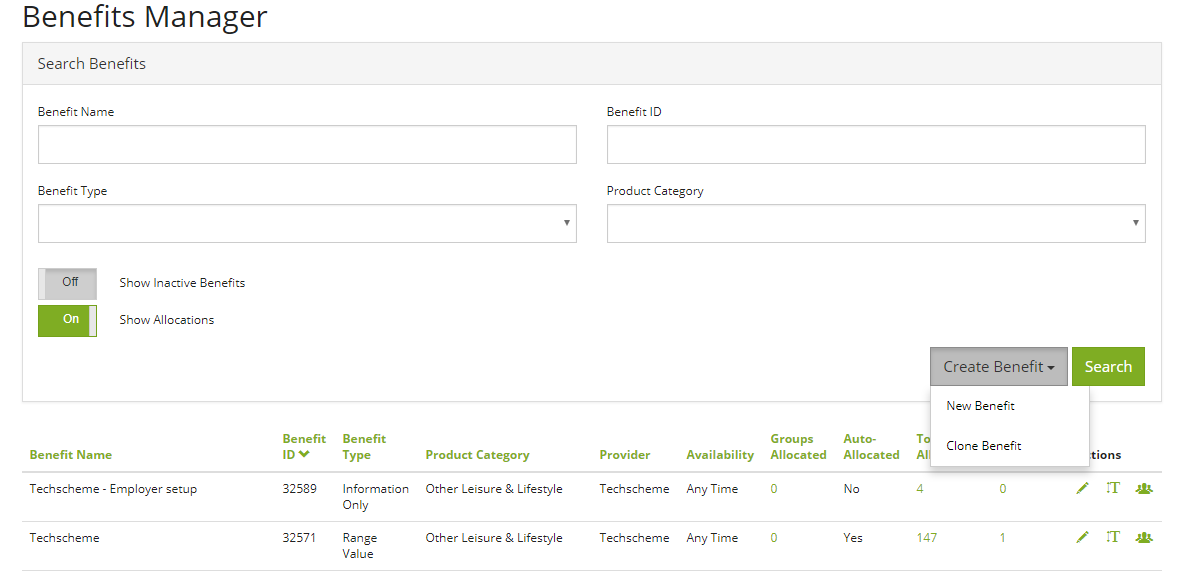
From here, you are ready to start configuring the benefit.
Step 1
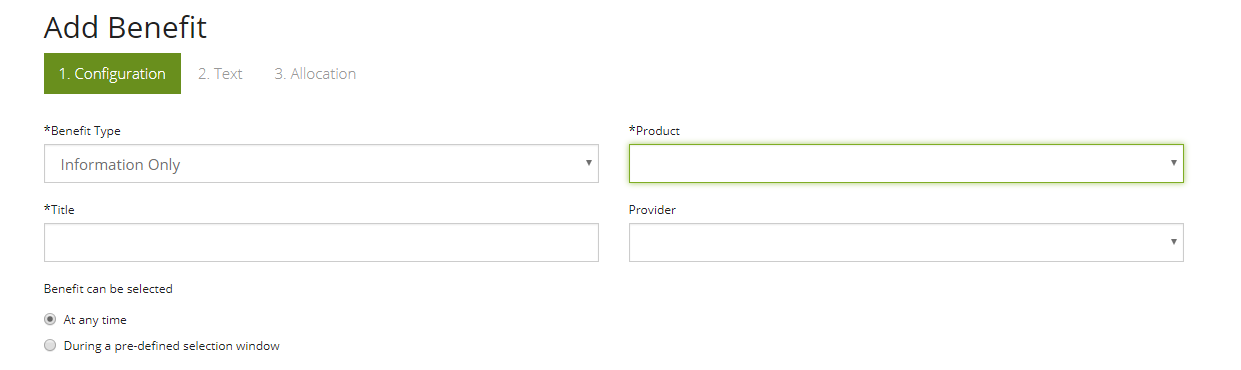
Select the benefit type to ‘Information Only’, Product classifies the benefit e.g. finance/healthcare but if you are unsure, select other. Title is also a required field, this is what the employee will see on the tile of the benefit when they are on the portal, enter your preferred title here.
Step 2
Next you must configure the availability of this benefit. Is it available to employees at any time during the year or only in a specific pre-defined window?
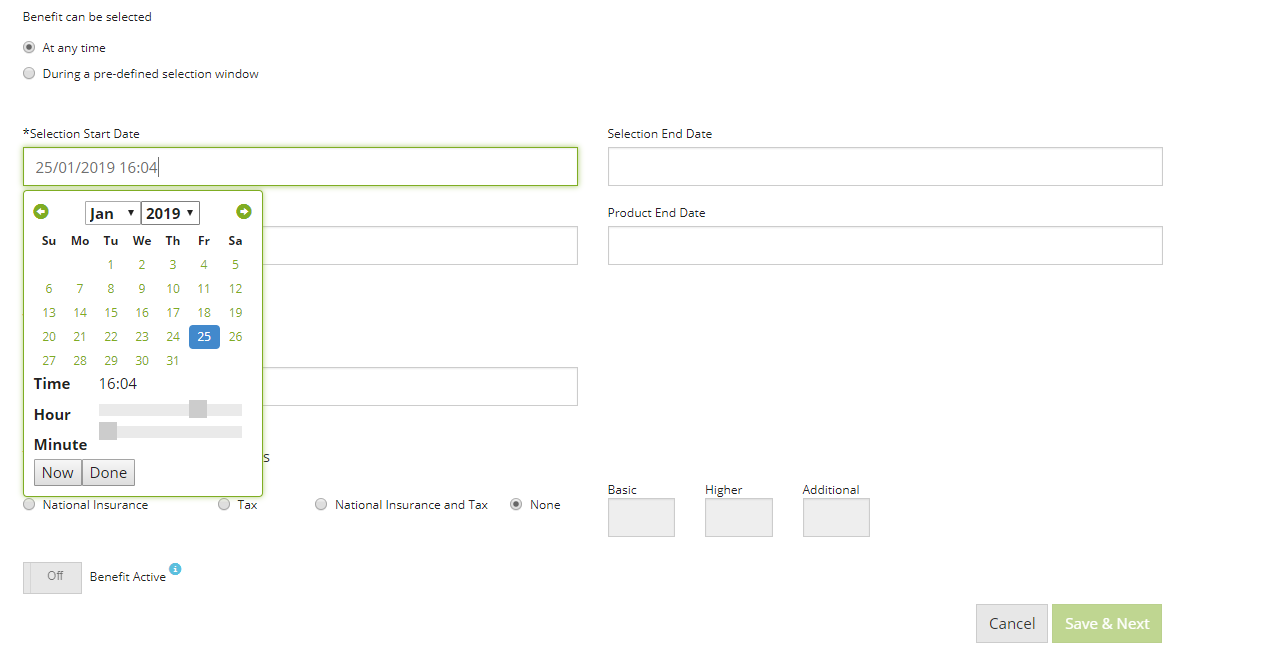
‘Selection Start Date’ refers to the day that an Employee can see the benefit on the portal and is a required field. You can also select an end date so employees can no longer view it after a certain date, but this field is not required.
Step 3
Select ‘Save & Next’ at the bottom of the page. Now you can add the text to be displayed on the benefit when an employee clicks on this benefit as well as updating the tile and banner images. There are different tabs for different information here so make sure the text is in the correct box. Furthermore, you can add links, images, tables and graphs in the text editor in order to make the benefit more eye-catching and break up big blocks of text.
Hint - The system will time out if you edit a benefit for more than 10 minutes (your browser thinks you have been inactive as no page refreshes) , so save the benefit every so often to avoid losing all of your text and images.
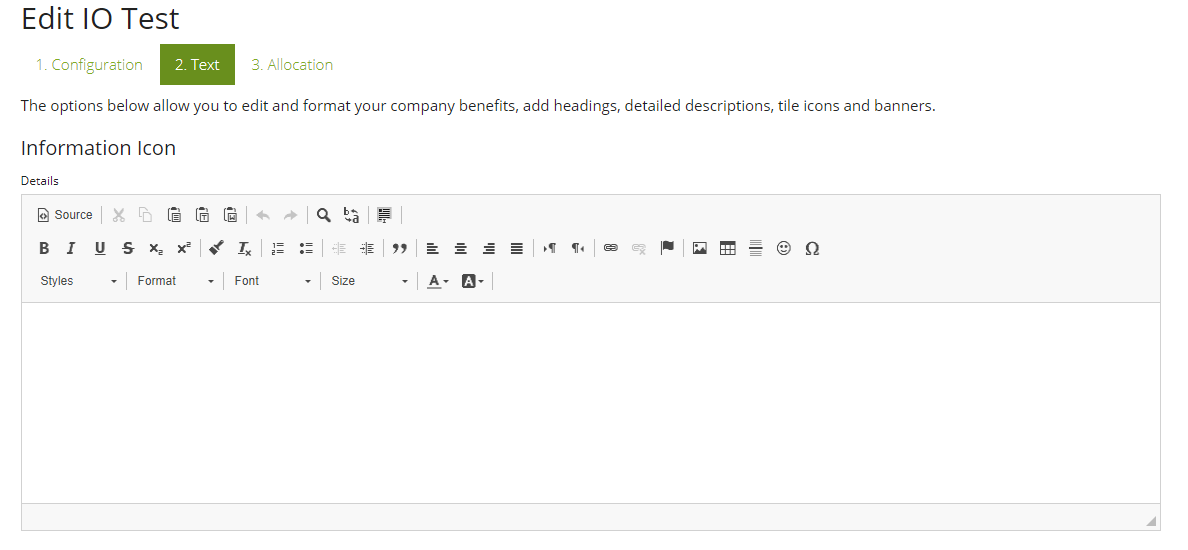
Once you have added all the text and images, remember to save any changes at the bottom of the page
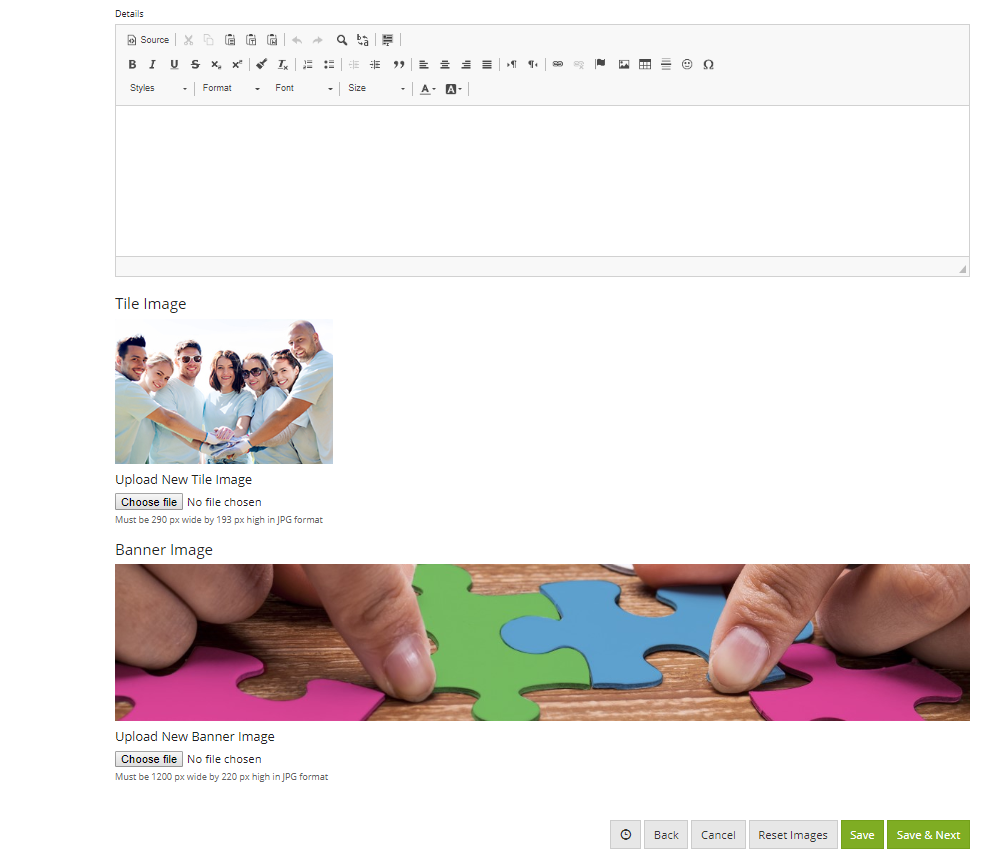
Step 4
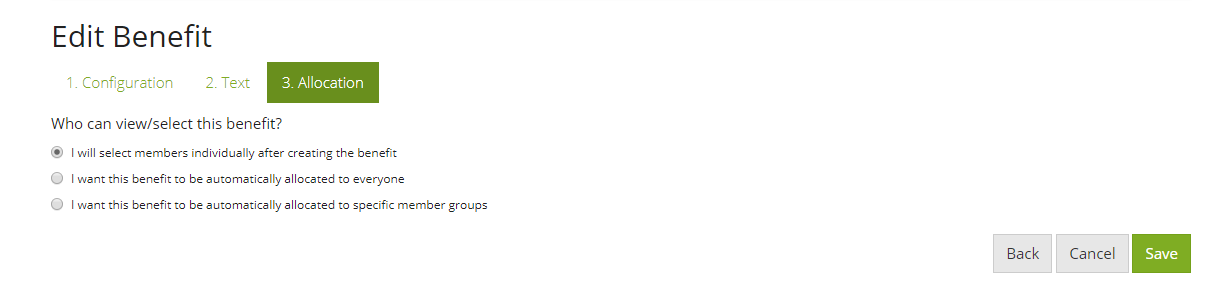
Allocations – Now you have 3 allocation options. You can allocate to all members of the organization, to specific pre-defined member groups in the organization or you can choose to manually allocate all the users who can see the benefit.
Hint - you may want to just manually allocate to yourself initially while you are testing the setup
Step 5
Now you are ready to activate the benefit. Select Save and you will get a pop-up asking if you are ready to save and activate the benefit.
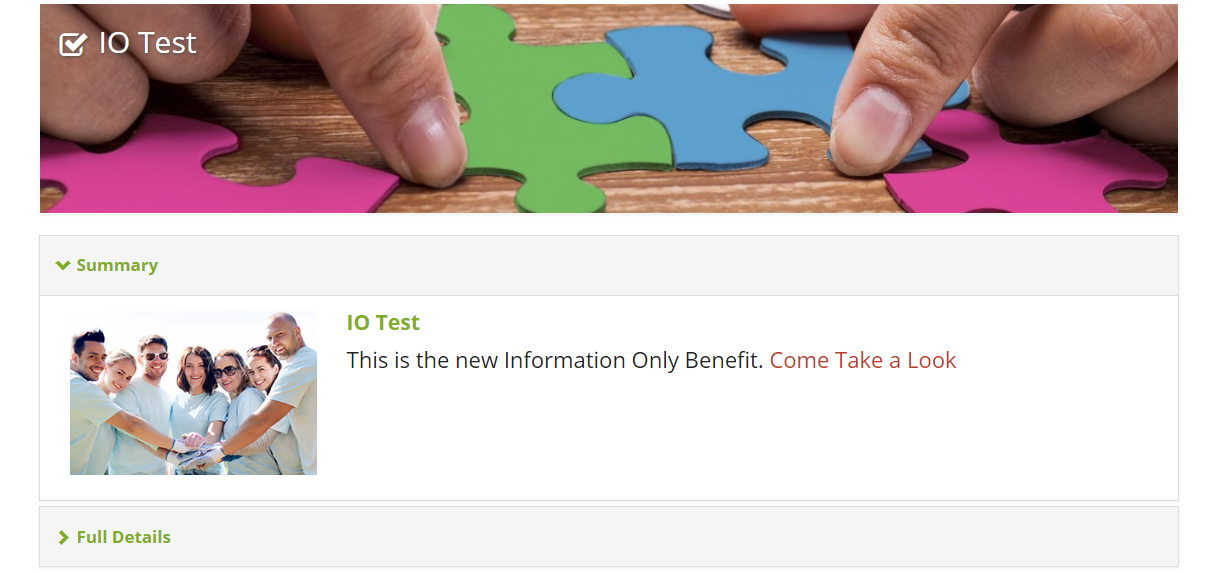
Congratulations, you have just created an information-only benefit! Go back to the employee dashboard, make sure you are viewing after the selection start date and the benefit has been allocated to the account you are viewing and find it on the benefits page.
Comments
0 comments
Article is closed for comments.