To add a benefit into a window is the same as creating a benefit with a slight difference.
To start, head to "Admin Suite > Benefits > Benefit Manager"
Inside the search area, is the option to "Create Benefit".
Step 1a - Configuration:
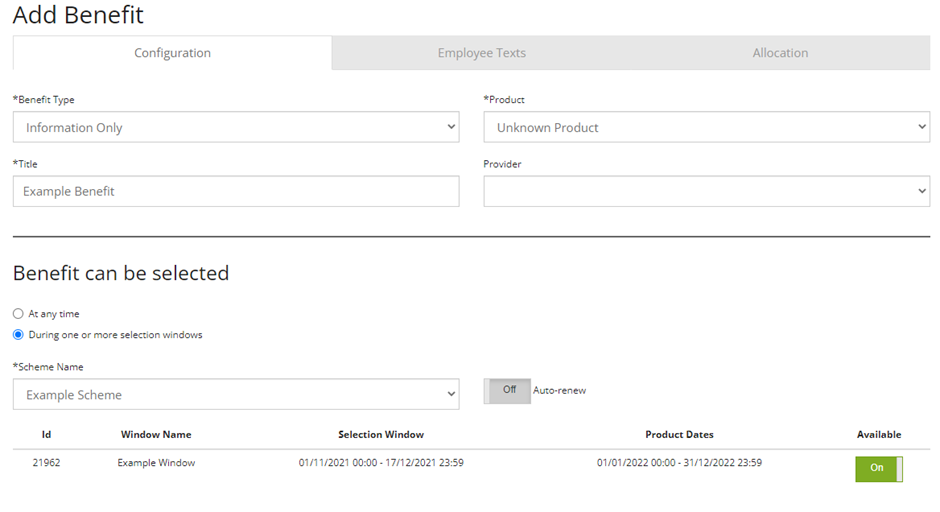
First up, give your benefit a name and select a provider if there is one but you can leave the provider field null.
The "Product" option doesn't affect what employees see but can be used on reports to help you see what types of benefits employees are selecting.
Step 1b - Configuration:
When choosing when the benefit can be selected click on the button ‘during one or more selection window’. Then choose the scheme that you would like the benefit to show in. As shown in the image below this benefit will be allocated to the ‘example scheme’ and turn the benefit to be available.
Step 2: Text and Content
After configuring the benefit you then need to add in text to the benefit. The text that can be included for the benefit can be summary information, supplier details, and full details including what the benefit is and how to claim the benefit.
Step 3: Allocation
The Allocation tab, this is where you can define who can see the benefit. You can create groups to group the employees and allow a certain employees access to the window benefit. For example, employees who have passed probation and probationary employees.
Then save and activate the benefit. Once this is done the benefit will be live during the window dates.
Comments
0 comments
Please sign in to leave a comment.