Our Grapevine module is used by a wide range of companies as their company notice board, community forum, events listing, and HR document library. It is only available to customers on the Standard or Bespoke plans.
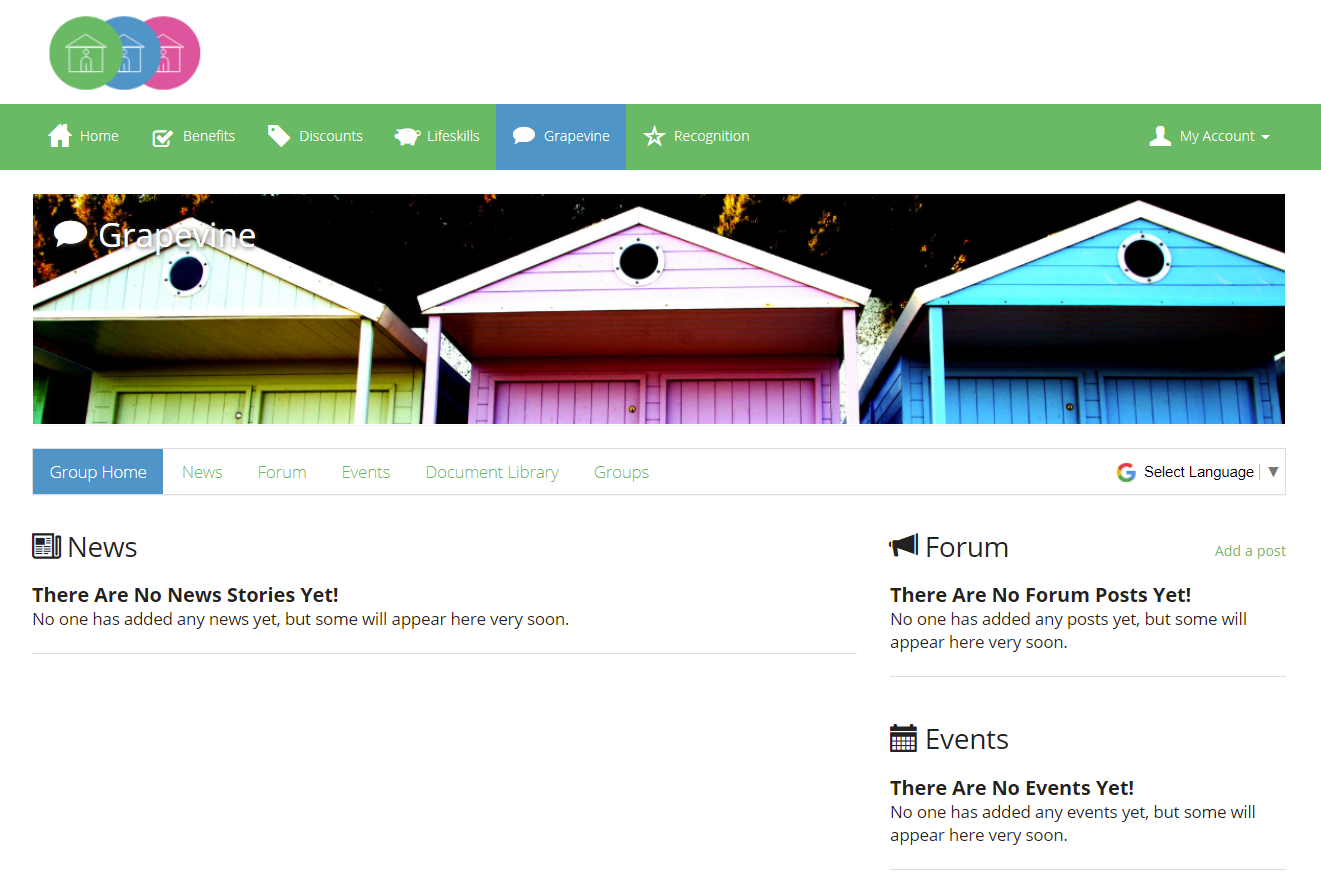
To start the setup, click the "Grapevine" tab from the main menu
You will note that grapevine is not pre-configured for you, allowing you to set it up yourself to match the way that suits your business and employees.
As this is going to be a long article, use this glossary to jump to the area you want to read about next:
Groups
Our first step is to create a group.
Grapevine revolves around Groups, without creating your first Grapevine Group you cannot add any news posts, events, forum posts, or documents.
Advanced Group Options:
- You can create groups then assign employees to groups manually, or instead leave them for employees to join themselves
- One single group can be set as a mandatory group, that all employees are put into automatically when they are created - we recommend you use this feature for an "All Staff" or "Everyone" group, so you can post company news out to everyone
- Employees can create their own groups, often used for social discussions
- You can have "Request to Join" groups - where either the group creator, or you the administrator, can grant the person access
- You can create a hidden group that is also request to join
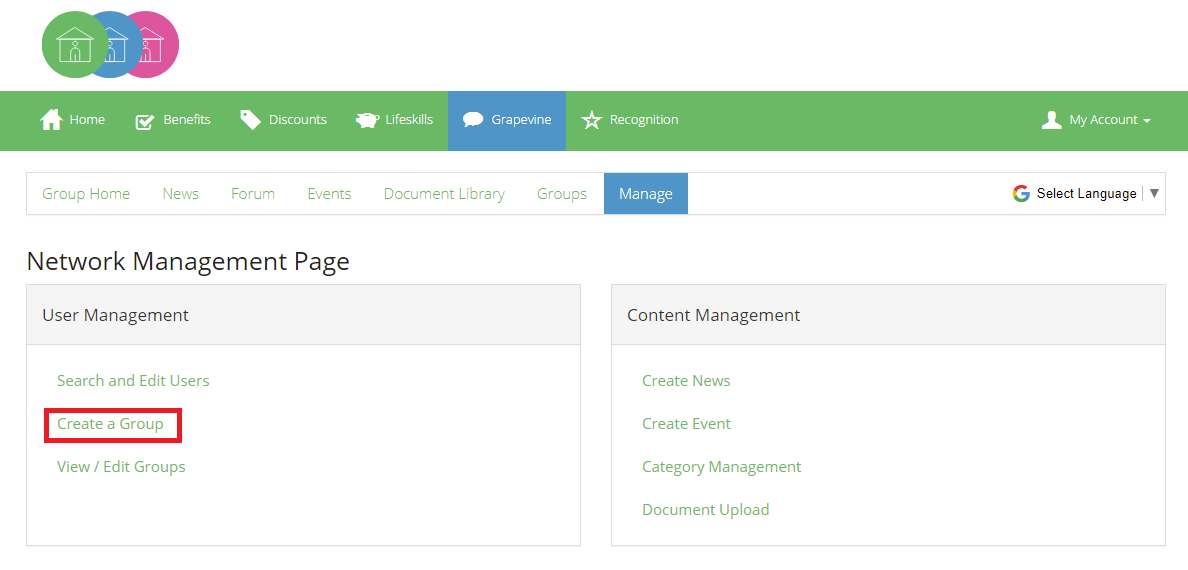
To create our first group, head to the "Manage" Tab inside of Grapevine and click "Create a Group" as highlighted in red on the screenshot below.
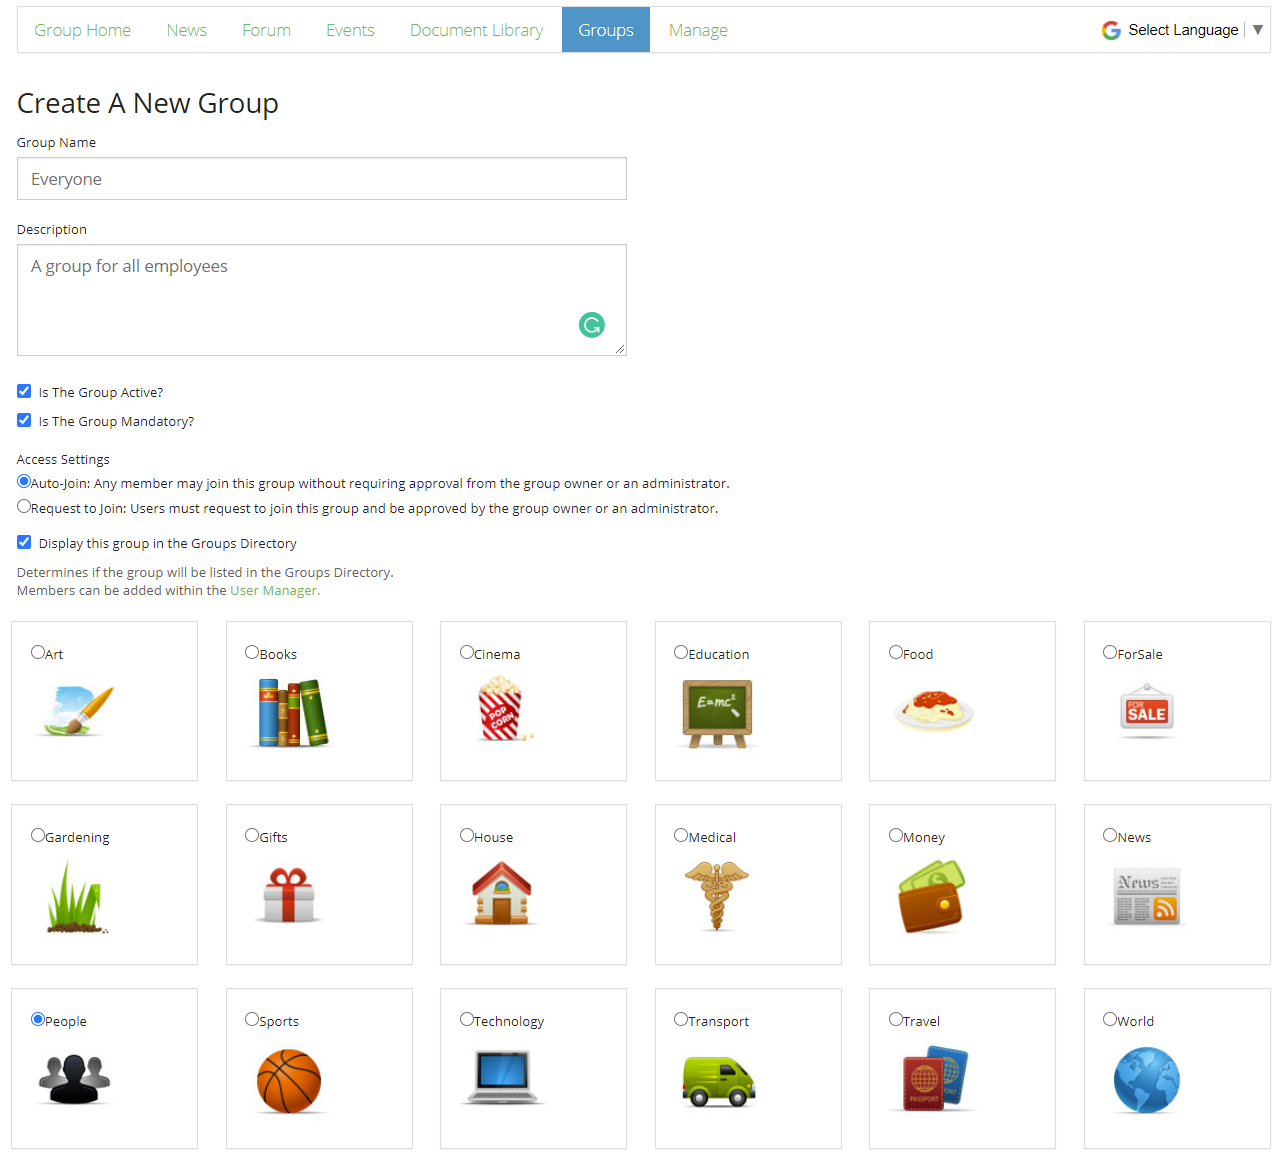
Go ahead and setup your first group, but if you're short of inspiration feel free to copy the Everyone Group in our example below; after all, we recommend you have at least one group that all employees are assigned to by default.
To create our Everyone group we have:
- Called our group the "Everyone" group
- Marked it as mandatory so all employees are automatically added to it
- Checked "Auto-join" so users are allowed instant access to the group, rather than need to be authorised to join
- Given our group a people icon
Once you have completed the information, press Save at the bottom of the page
You will then see that your group has successfully setup, and you have automatically been added to it. 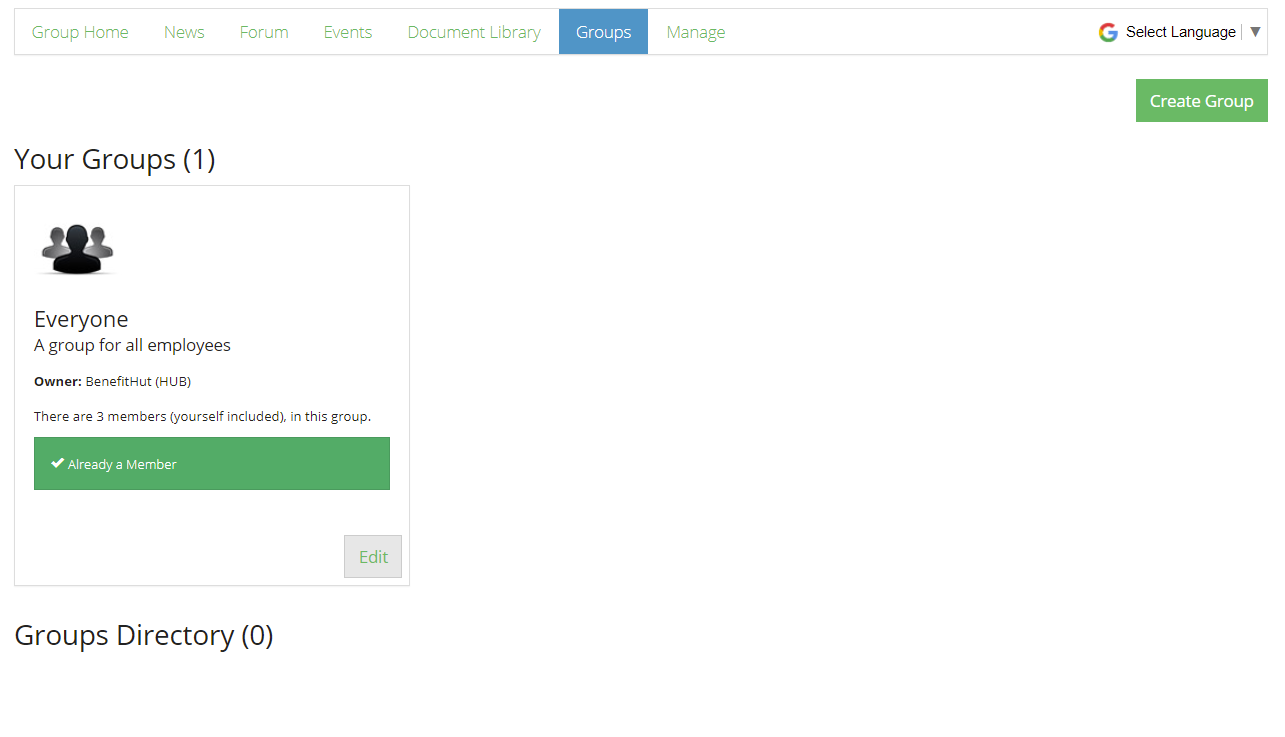
Now why not try that again, but this time make a voluntary group. Note that whenever you create a new voluntary group, you'll be automatically assigned to it, but other employees will see it in the "Groups Directory" area.
Creating your first News post:
Only you, the administrator, can create News posts. You must have created a group first otherwise your post will not show
From the menu, click the "News" tab followed by "Create a News Story"

Proceed to give your news post a title and write your story. The story box has a nice text editor, allowing you to style it accordingly.
Styling tip: to make a heading, select the text required, and click the "Format" option on the text editor, and select "Heading 2".
Next steps:
- Assign your news story to a group
- Check whether you want staff to comment and whether an email should be sent to them
- Choose a picture (Optional)
- Choose the category that best fits your news post; categories are used later for the employees to filter through news posts when there are hundreds of posts to read through
- Click to "Preview" your post
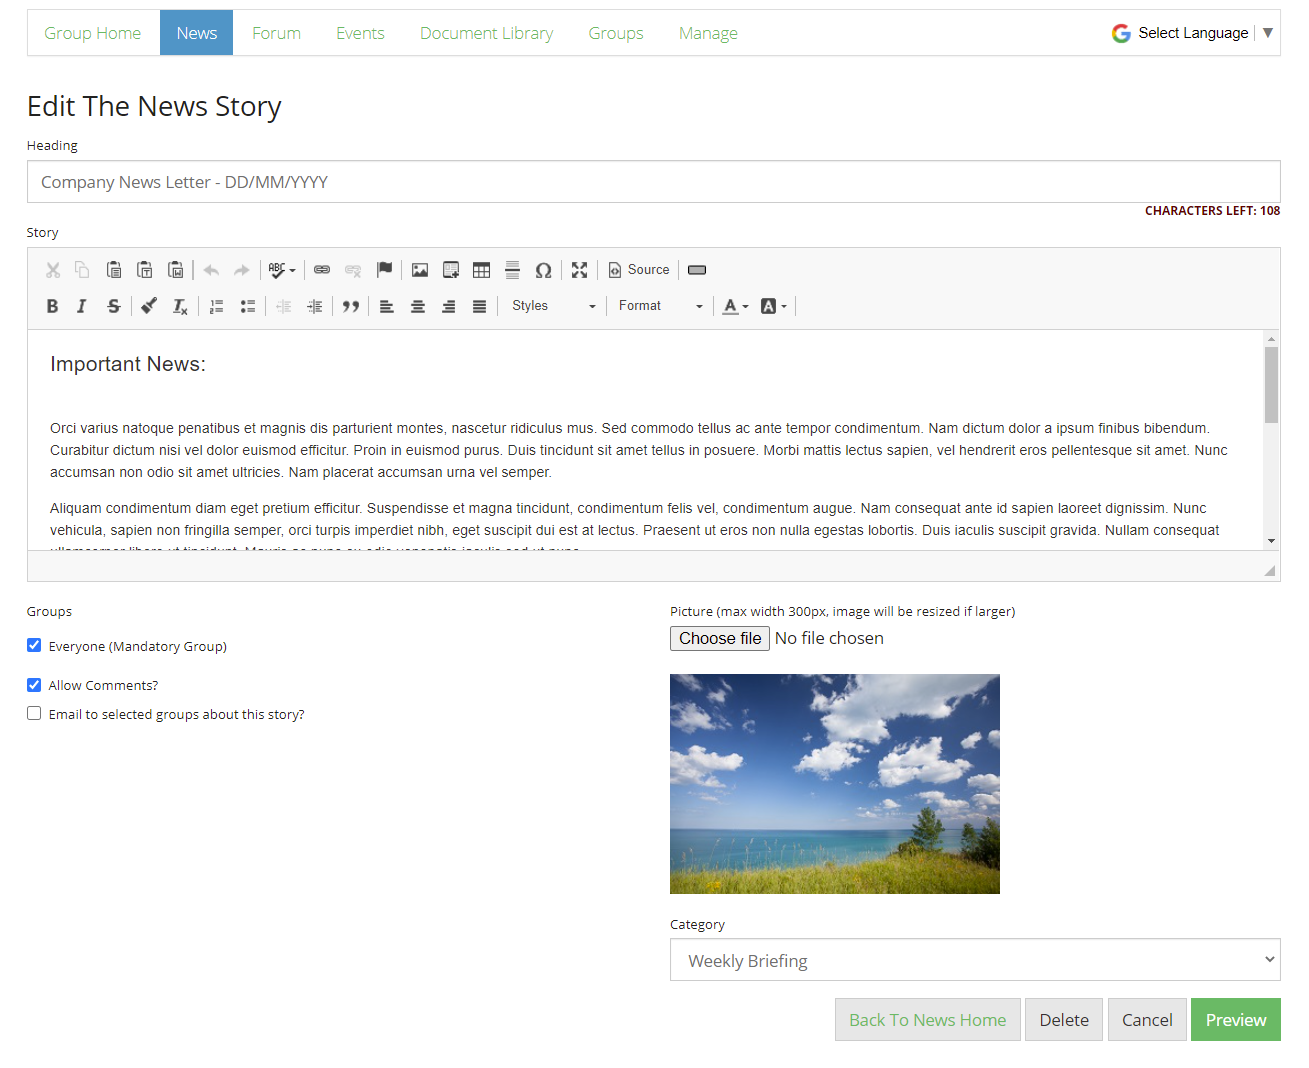
The preview lets you see how the story will appear to employees; you can either choose to publish it or go back to editing it accordingly.
Once you're happy, click to "Publish" your News story.
Your News story will now appear in the "Group Home" page, and on the "News" pages.
Forum:
The forum is designed as an employee discussion board. Employees can create forum posts, and other employees can comment on these posts.
Employees can go to "Forum" followed by "Create a New Post", then use the same text editor as available inside News Stories. 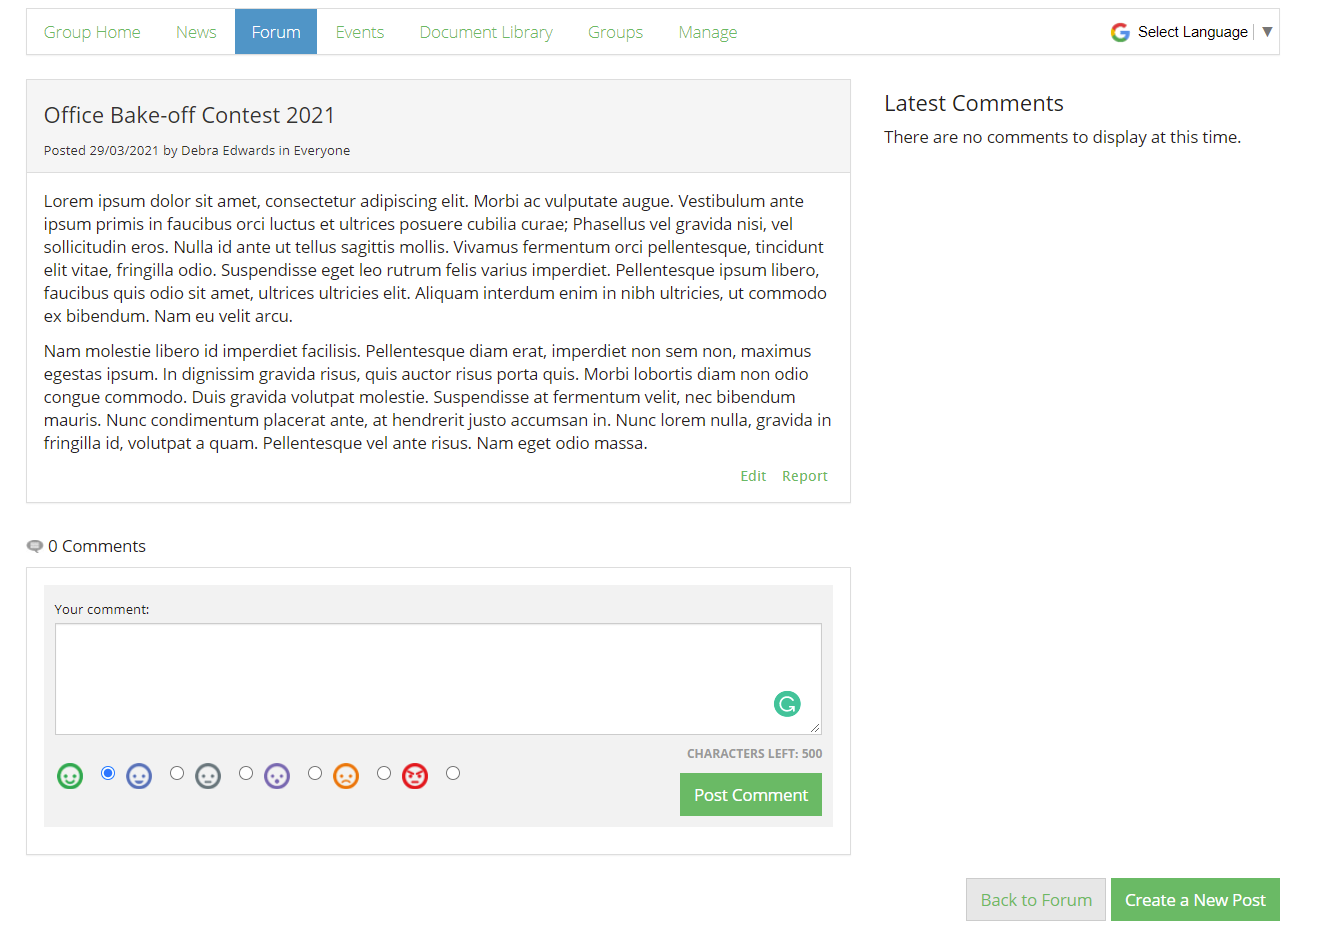
Events:
Only you, the administrator, can create events.
Events can be used by the company to invite employees to attend. You can then see who has confirmed their attendance.
You can assign the event only to certain groups, and you have use of the text editor to style your message to employees.
To start, enter your details and click "Post Event" - note there is no preview option with Events.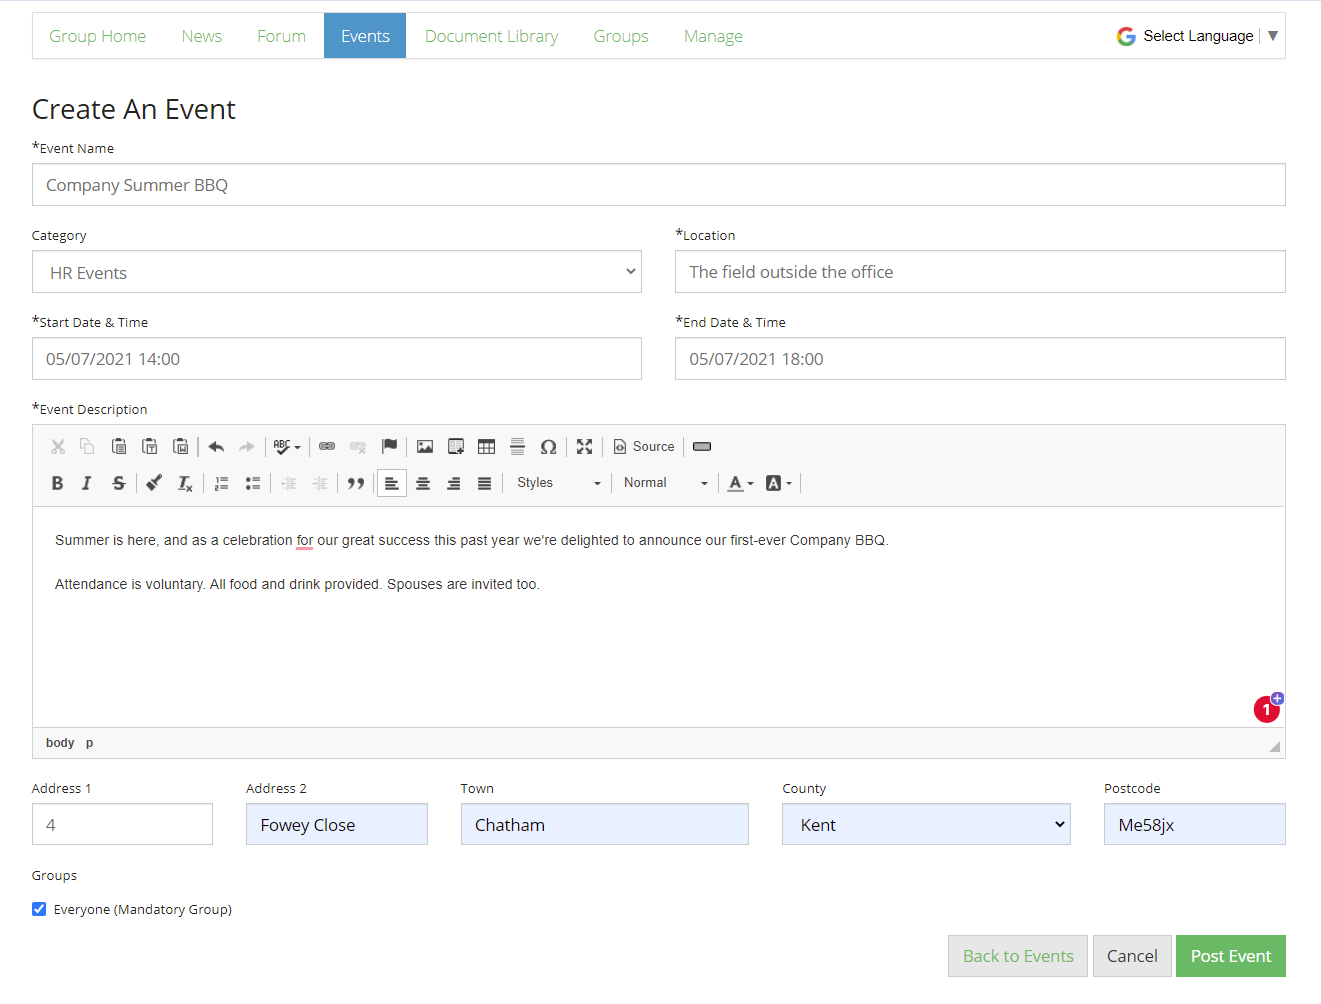
Once posted, you will be sent to the Events board and you will see it how employees will see it.
For this example we have gone in as a test employee, and clicked the "Attend Event" button; the screenshot below now shows the count of employees who have said they are attending.
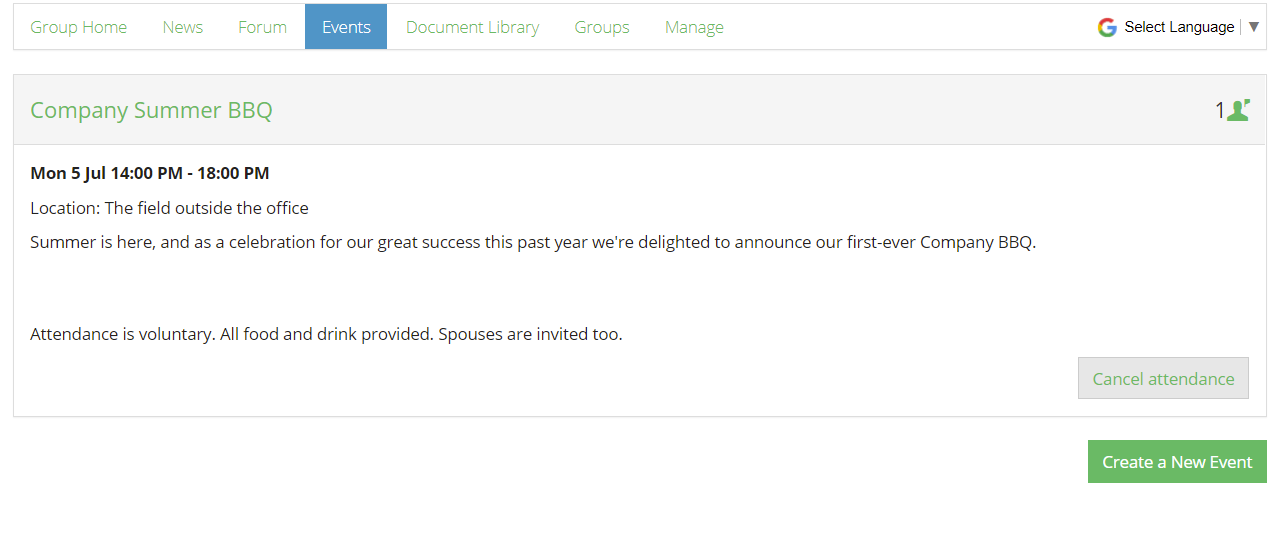
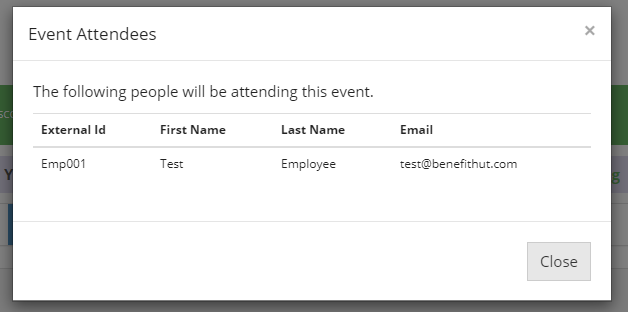
If you're an admin, you can click the person Icon to see the list of attendees:

Documents
The document library is a much used tool for small companies who have not had the time or finances to invest in a dedicated document storage solution, or network.
Only an administrator can upload a document. You must have created a group first otherwise your document will not show.
To upload your first document, navigate to the "Documents" tab, and click "Upload Document".
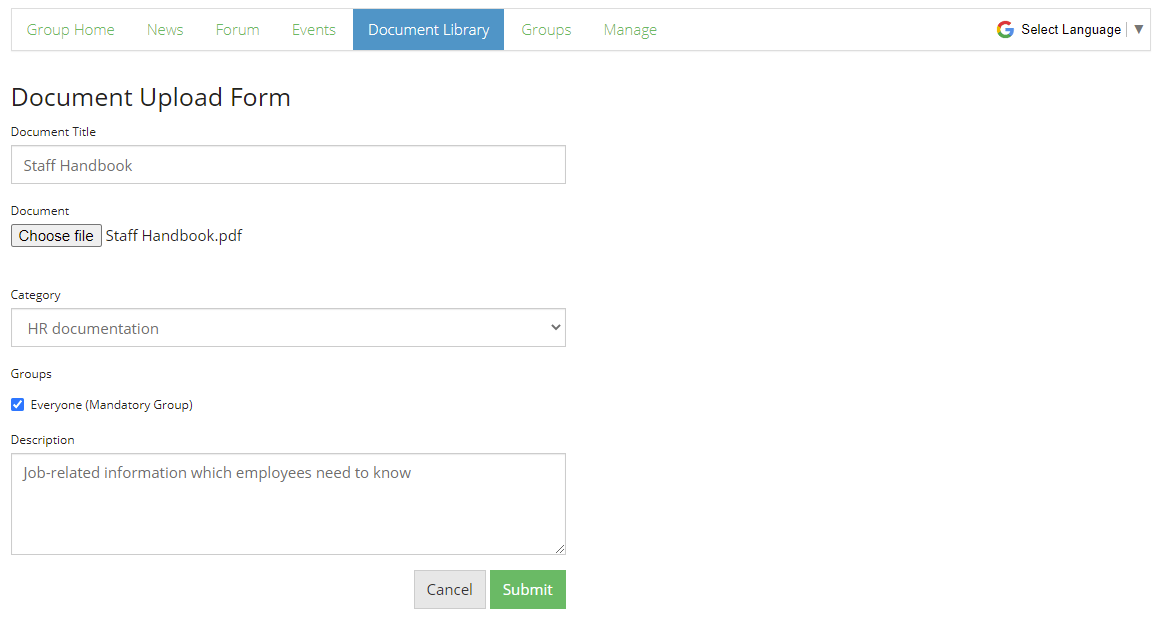
You'll be taken to a page where you can title your document, select the file to upload, choose a category that best fits (used by employees to filter content), choose which groups this document should be visible to, then lastly add a short description.
Once you're done, click Submit, and your document is available for employees to view. Easy 😊
Conclusion
This guide only touched the surface of what's possible with Grapevine. The tools are available for you to utilise it.
If you wish to give another employee the administration rights to setup or maintain grapevine, then following this guide on how to access the admin roles page, and give that employee the "Grapevine Administrator" role.
Good luck!
Comments
0 comments
Please sign in to leave a comment.