Step 1 - Navigate to the correct area
My Account > Admin Suite > Benefits > Benefit Manager >Benefit Windows
Step 2 - Set the window to be allocated to individuals
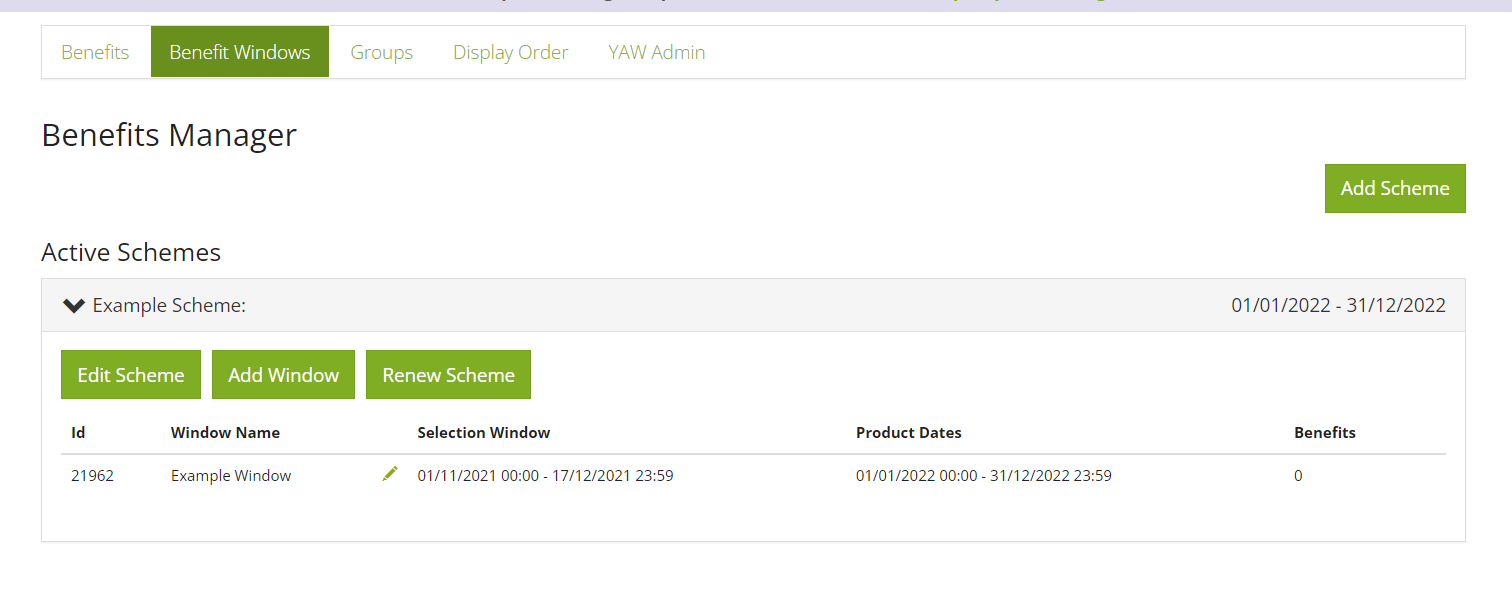
Edit the window, using the pencil icon.
Then at the bottom of page you can change the ‘Window Availability’. Click 'Available to Individuals’ and save.
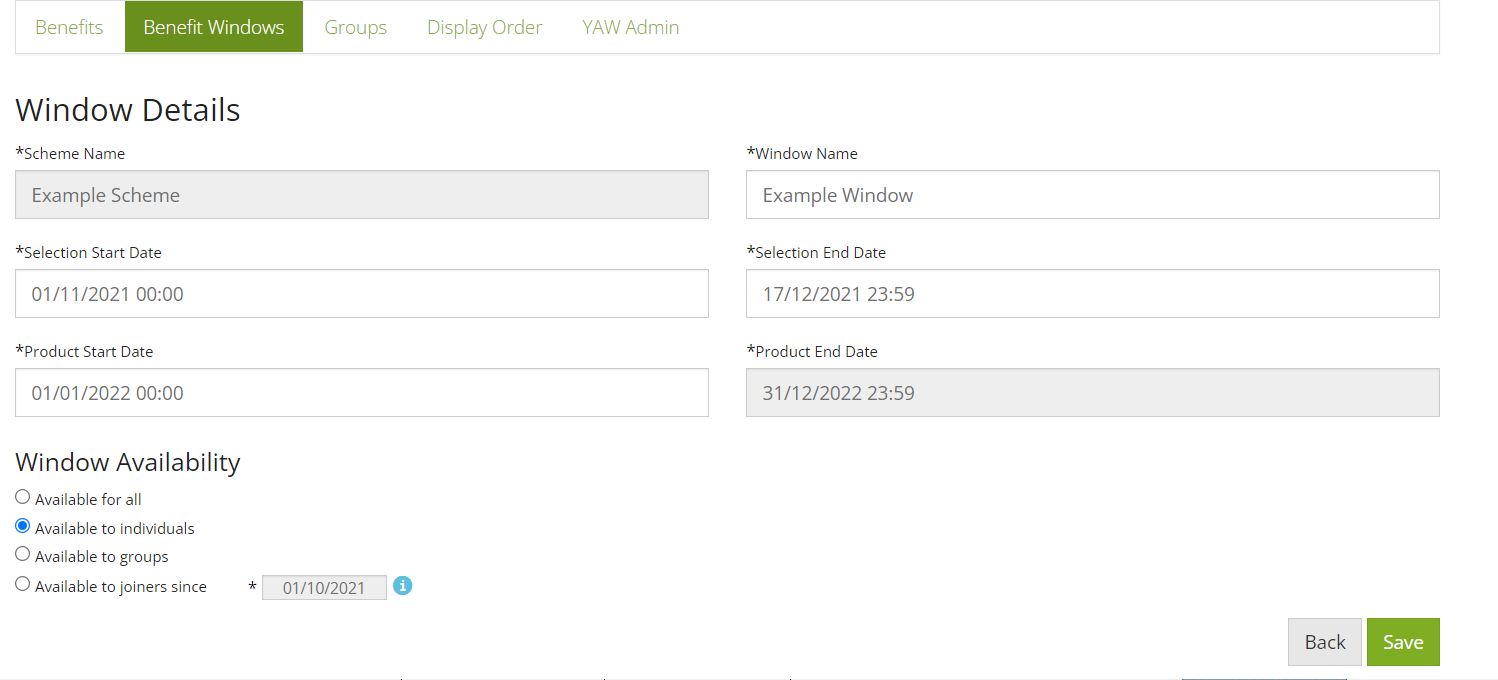
Then click 'Manage Availability' and this will take you to a page where you can add individual users to the window.

Step 3 - Select the specific individuals
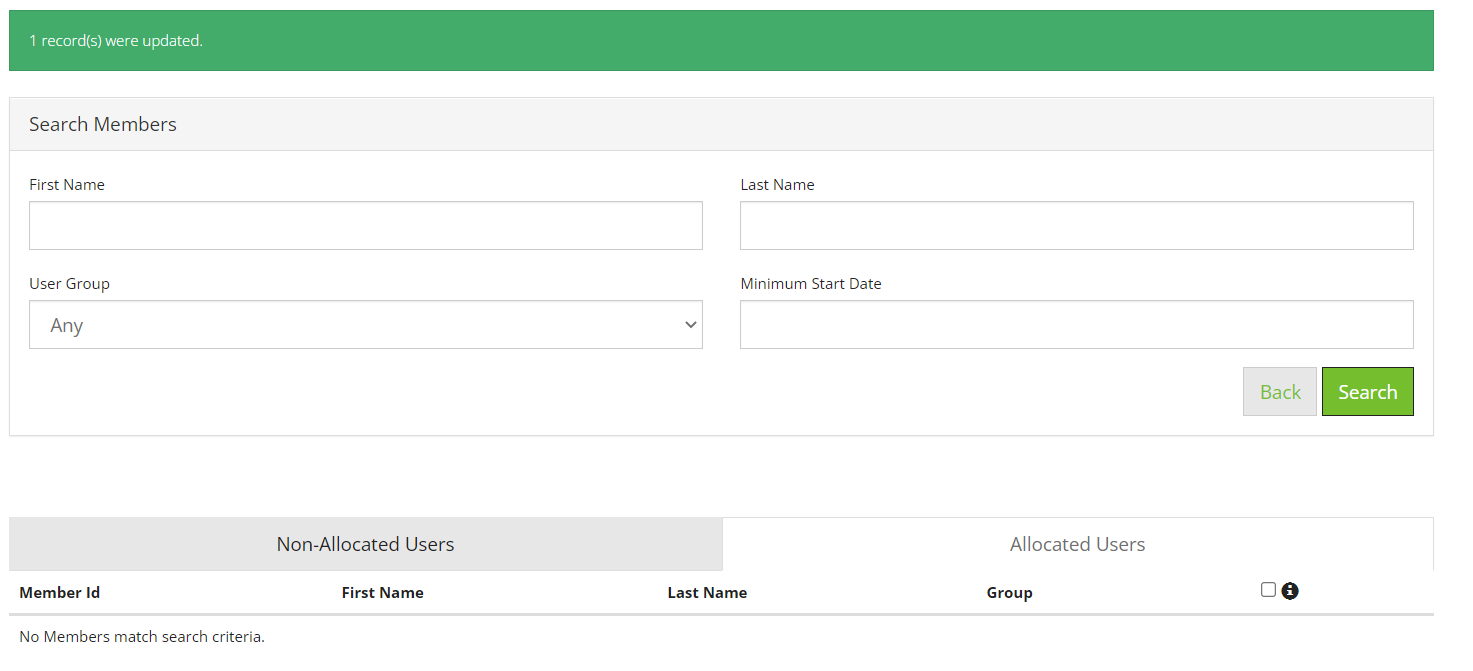
You can search for users to allocate to or filter by User Groups to assist you in this task.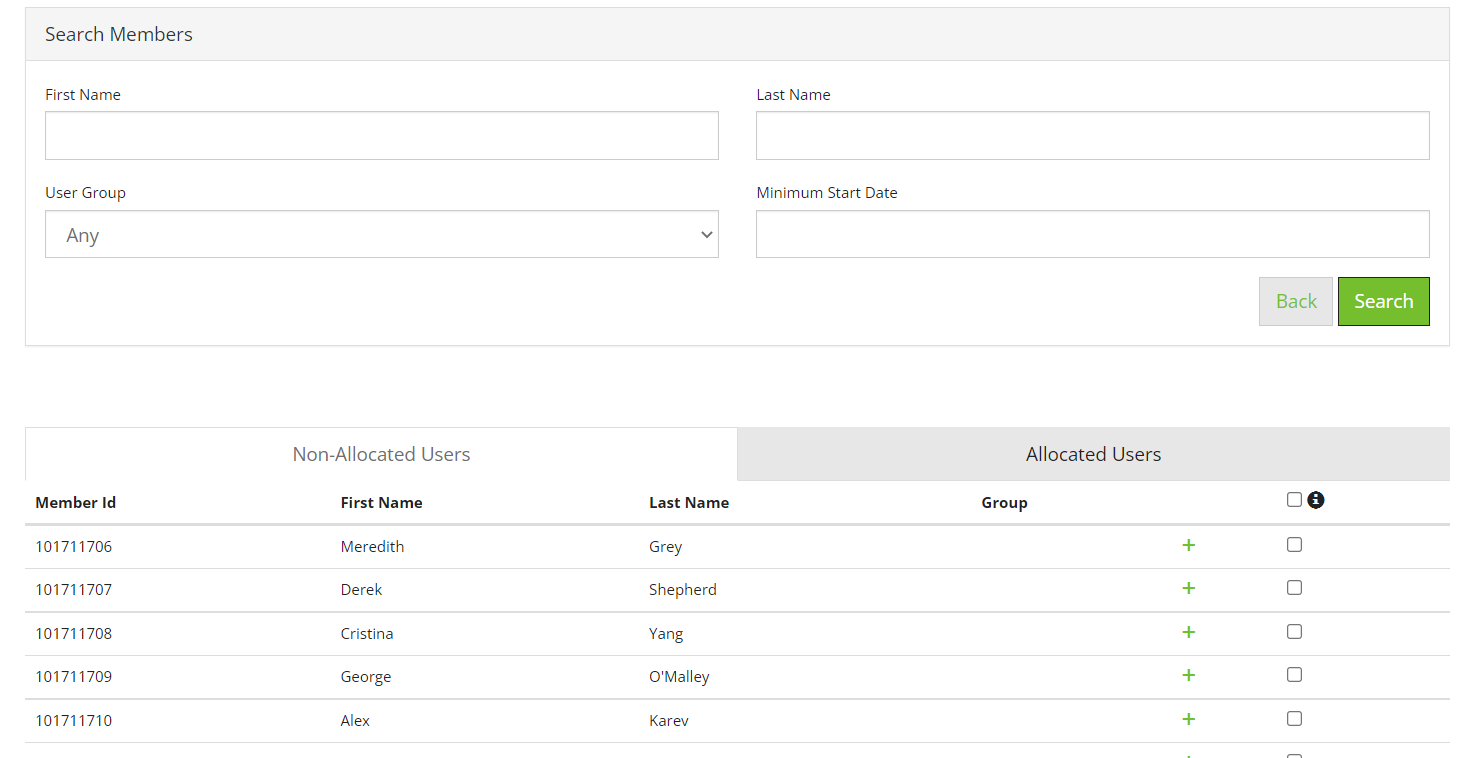
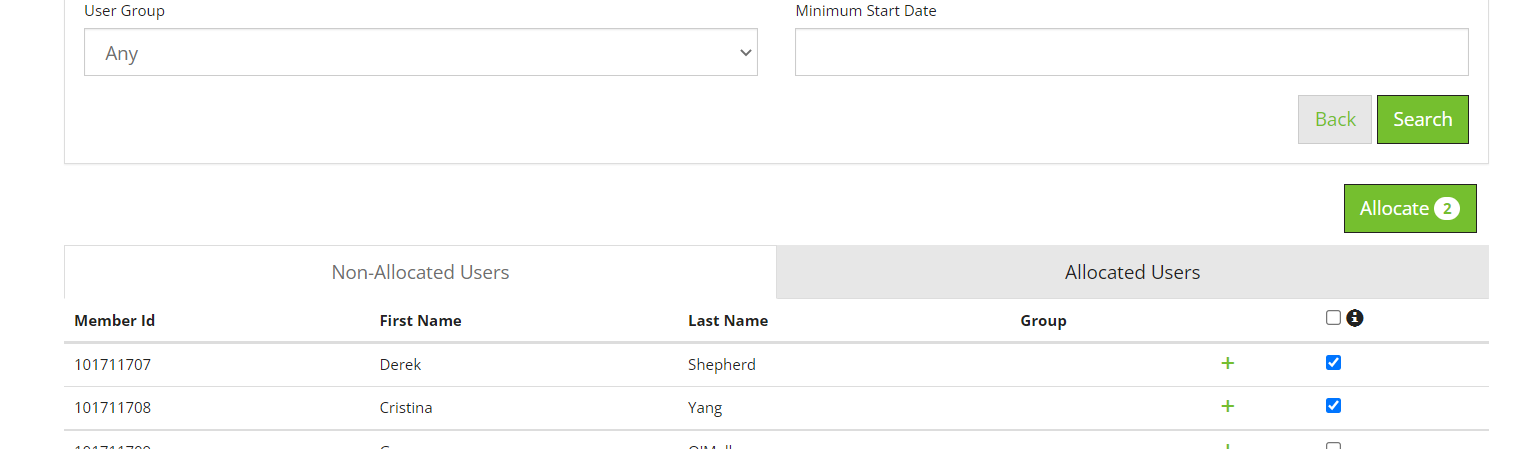
You can then allocate individually by clicking the allocate icon  or by ticking the box to select multiple users and clicking Allocate.
To remove an allocated user, click 'Allocated Users'. Then click on the bin icon.

This will remove the user instantly, and the banner at the top of the image confirms that the user was removed from the window.
Comments
0 comments
Please sign in to leave a comment.